Creating a Blog with MkDocs and Cloudflare Pages
In this post, I'll share my experience setting up a personal blog using MkDocs Material and Cloudflare Pages. This combination offers a powerful, flexible, and cost-effective solution for those looking to establish an online presence.

If you're considering starting a blog, finding the right tools in the myriad of options available can be a challenge. For me, I had a clear set of priorities:
- Markdown-based content creation
- Python-based (for easier debugging)
- Design and feature flexibility
- Free or low-cost hosting
- Streamlined deployment process
My goal was to spend little to no time on maintenance or development when posting new content. After thorough research and experimentation, I settled on using MkDocs Material as my blogging framework and Cloudflare Pages for hosting. This combination ticked all the boxes for me.
Finding the right tool
The journey wasn't without its challenges. Looking for the perfect tool from the myriad of options available can be a very time-consuming and never-ending task. My suggestion is to start with something simple (e.g., an MVP), focus on the content, and polish it as you go. That is what I'm trying to do here.
MkDocs Material
MkDocs Material is a static site generator primarily designed for technical documentation but has also emerged as an exceptional choice for blogging due to its plugins and simplicity. The key advantages for me were:
-
Familiarity: I was already using Markdown files in Obsidian for my personal documentation, making the transition to MkDocs smooth.
-
Community Support: MkDocs is frequently used for documenting open-source tools like FastAPI and Pydantic, ensuring a robust community and continuous development.
-
Extensive Customization: The Material theme offers extensive customization options, allowing me to create a unique look for my blog.
-
Rich Built-in Functionality: Features like search functionality, dark mode, Google Analytics integration, and responsive design come out of the box.
I also considered using Jekyll, Hugo, and Pelican. While each has its strengths, MkDocs Material's combination of user-friendly features, strong community support, and alignment with documentation practices made the most sense for me.
Cloudflare Pages
Cloudflare Pages is a cutting-edge static site hosting and continuous deployment platform that offers developers a seamless experience for building and deploying websites. With its robust features and generous free tier, it has quickly become a popular choice among developers seeking efficient and scalable solutions.
-
Effortless Continuous Deployment: The platform simplifies the deployment process by integrating directly with your Git repository. Once connected, every push to your main branch triggers an automatic deployment, streamlining your workflow.
-
Preview Deployments: Automatically generates preview URLs for every pull request, enabling efficient testing and collaboration.
-
Generous Free Plan: Up to 500 builds per month, unlimited active preview deployments, unlimited bandwidth and requests, and support for up to 20,000 files per project (within the max file size of 25 MiB).
-
Reliability: It leverages Cloudflare's global network of data centers to deliver content with exceptional speed and reliability. This ensures that your website is served from a location close to your users, significantly reducing latency.
Beyond basic static site hosting, it can also integrate with Cloudflare Workers (similar to AWS Lambda or GCP Cloud Functions), supporting server-side rendering and API routes while still using the free tier. Additionally, there are plugins that can be easily incorporated into your Pages application, enabling common functionalities like authorization header validation and API server creation.
I also evaluated Netlify, Vercel, and GitHub Pages. However, Cloudflare Pages offers a compelling package for developers looking for a modern, efficient, and scalable platform for web development. While GitHub Pages was familiar, I wanted to explore a new product. Cloudflare Pages won out due to its integration with my existing Cloudflare-registered domain and its robust free plan.
Setting Up Your Own Blog
Here's a simplified guide to get you started:
-
Set Up MkDocs Material: Install MkDocs Material using pip and create a new project. Follow the MkDocs Material getting started guide for detailed instructions. Configure your
mkdocs.ymlfile to enable the blog plugin. For example, myyamlfile looks like this:site_name: Random Noise site_url: https://randomnoise.dev site_author: Victor Bouzas site_description: Victor Bouzas' personal website and blog. docs_dir: website nav: - Home: index.md - Blog: - blog/index.md theme: name: material custom_dir: website/assets/overrides favicon: assets/base_images/favicon.png logo: assets/base_images/favicon.png palette: - media: "(prefers-color-scheme: dark)" scheme: slate primary: black accent: indigo toggle: icon: material/brightness-7 name: Switch to light mode - media: "(prefers-color-scheme: light)" scheme: default primary: white accent: indigo toggle: icon: material/brightness-4 name: Switch to dark mode font: text: 'Inter' code: 'Hack' plugins: - blog: blog_dir: blog blog_toc: true post_dir: blog/posts post_date_format: medium post_url_format: "{date}/{slug}" authors: true categories: true categories_allowed: - General - Software Engineering - Data Science post_excerpt: required post_excerpt_separator: <!-- more --> archive: true archive_name: ArchiveCreate your first blog post in
docs/blog/posts/with appropriate metadata. Refer to the Blog plugin documentation for more details on setting up and customizing your blog. -
Push Your Project to a GitHub Repository: Initialize a Git repository in your project folder, commit your changes, and push them to a new GitHub repository. If you're new to Git, check out the GitHub quickstart guide.
-
Deploy to Cloudflare Pages: Log in to your Cloudflare dashboard and create a new Pages project. Connect it to your GitHub repository and configure the build settings. Follow the Cloudflare Pages MkDocs guide for detailed instructions. In summary:
- Build command:
mkdocs build --site-dir public - Build output directory:
/public
Cloudflare Pages will automatically deploy your site whenever you push changes to your main branch.
Alternative Continuous Deployment Workflow
If you prefer not to give Cloudflare agent access to your GitHub repository, you can create your own workflow with GitHub Actions and deploy using the Cloudflare CLI. This gives you more control over the deployment process.
- Build command:
-
Domain Setup: Purchase a domain on Cloudflare Registrar (starting at $7/year). To add a custom domain to your Pages project:
- Go to your Pages project in the Cloudflare dashboard.
- Navigate to "Custom domains."
- Select "Set up a domain."
- Enter your domain and follow the prompts.
For more detailed instructions, refer to the Cloudflare custom domains guide.
Free domain
If you're not ready to purchase a domain, check out GitHub Pages for free hosting on their custom domain or even use the free
*.pages.devsubdomain provided by Cloudflare Pages.
Content Creation Workflow
Here's my process for creating a new post:
- Create a new Markdown file in the
blog/postsdirectory with the necessary metadata (i.e., date, title, description, tags, and category). - Write the content using Markdown syntax.
- Create a new branch, commit changes, and push them to the repository.
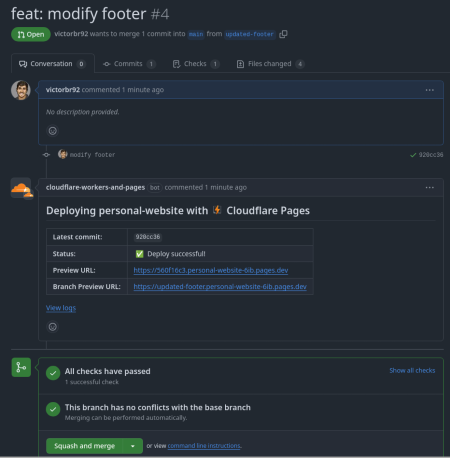
- Preview changes on the branch-generated preview URL provided by Cloudflare Pages.
- Merge the branch into
mainand verify the changes on the live website.
Rollbacks
You can always roll back deployments via the Cloudflare Pages dashboard if needed.
Additional Features
To make my blog more engaging and functional, I added some additional tools:
-
Comments: I integrated Giscus for GitHub Discussions-powered comments, which comes "free" with MkDocs Material.
-
Newsletter: I'm using KIT for newsletter functionality.
-
Analytics: I implemented Google Analytics for basic page analytics, mainly to motivate myself by seeing some numbers.
Finding free, non-invasive resources was challenging. The current solutions were chosen primarily for their convenience and cost-effectiveness, but I plan to reevaluate periodically.
Conclusion
Setting up this blog has been an enlightening experience. The combination of MkDocs Material and Cloudflare Pages provides an excellent balance of functionality and simplicity. For those considering starting a blog or revamping an existing one, this setup is worth exploring.
Starting this blog serves multiple purposes:
- Showcasing expertise and creating networking opportunities.
- Documenting growth and building a portfolio.
- Documenting interesting concepts/ideas for personal reference in the future.
- Learning through teaching.
What has been your experience with blogging platforms? Have you tried MkDocs Material or Cloudflare Pages? Share your thoughts in the comments below!
If you want to share any piece of this write-up, please cite it as:
@article{victorbrx,
        title   = {Creating a Blog with MkDocs and Cloudflare Pages},
        author  = {Regueira, Victor B.},
        journal = {randomnoise.dev},
        year    = {2025},
        month   = {Jan},
        url     = {https://randomnoise.dev/blog/2025/01/06/creating-a-blog-with-mkdocs-and-cloudflare-pages/}
}
Stay Updated
Want to get notified about my latest posts and insights? Subscribe to my newsletter: